Before you invite
- Confirm the correct workspace is active in the header (invites belong to that workspace only).
- Invite people into the smallest role they need — Owner keeps billing and account control.
- Use a real email they can open; existing Postsiva users join right away, new users get a 7-day join link.
1. Open Team members
In the workspace sidebar, select Team members. The Members page lists Active members (name, role, social accounts) and Pending invitations for people who have not joined yet.
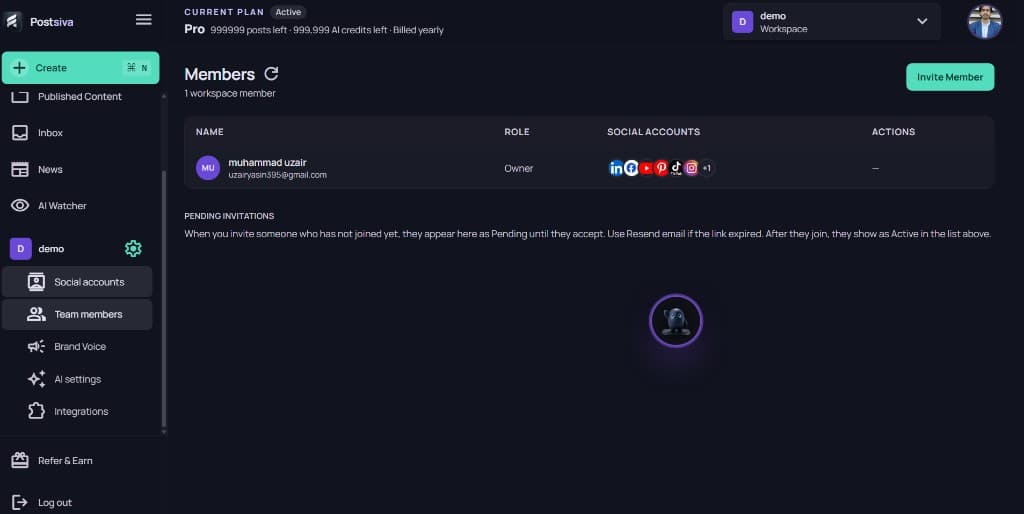
2. Invite member
Select Invite Member. Enter their email address, choose a role (for example Editor), then select Add member. Cancel closes without sending.
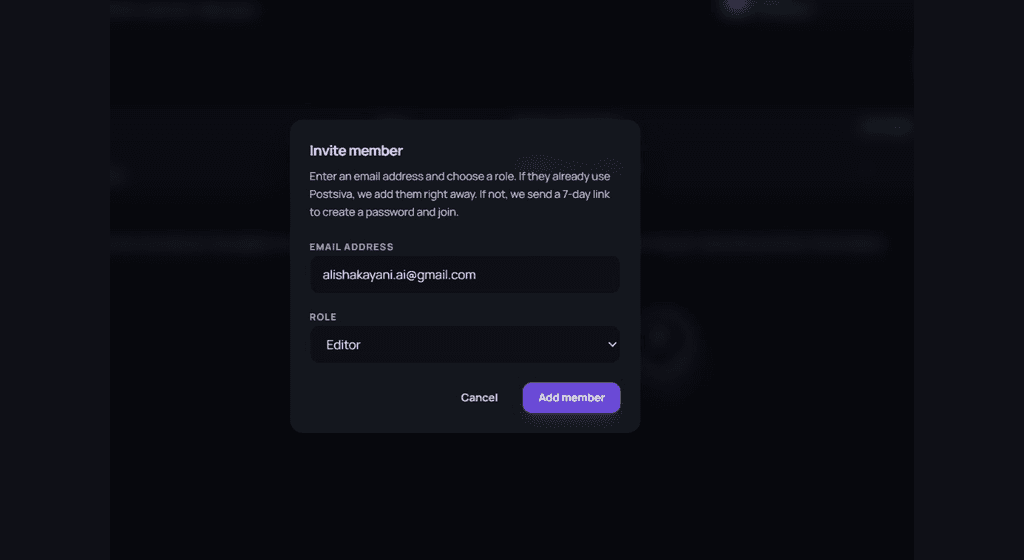
If they already use Postsiva, we add them right away. If not, we send a 7-day link to create a password and join.
3. Confirm they were added
After a successful invite, a banner confirms the email was added. The Members table shows the new person with their role (for example Editor) next to the Owner. Pending invitations stay empty when they joined immediately.
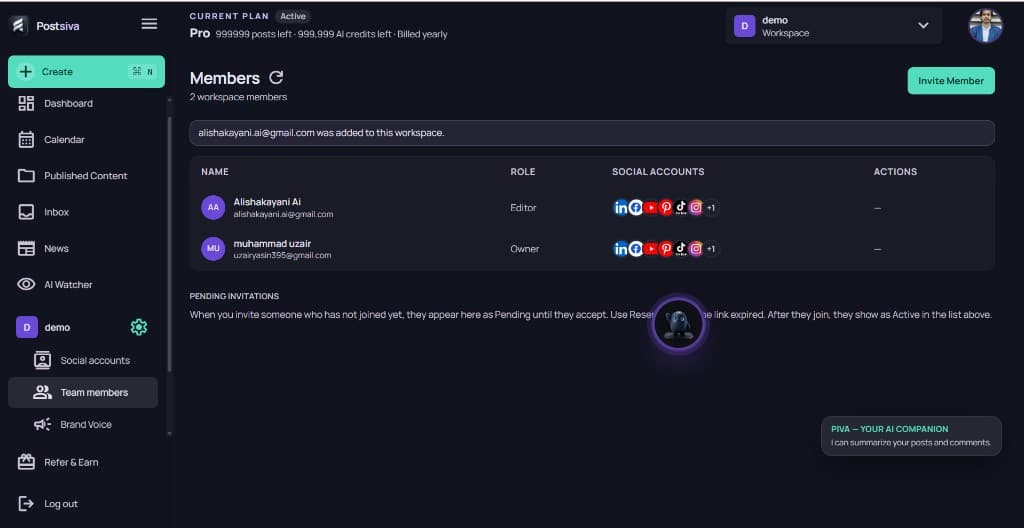
Roles and pending invites
- Owner — full workspace control, including connections and billing-sensitive actions.
- Editor (and other roles) — collaborate on content with the access that role allows.
- Pending — invitees who have not accepted yet appear under Pending invitations; use Resend email if the link expired.
- After they join, they move to Active in the members list above.